Tuesday, November 29, 2011

Decorative Stitching: Corded Neckline

My obsession with "Mad Men" combined with the plethora of vintage sewing blogs on the web has really piqued my interest in vintage sewing techniques and details.  One of those techniques is to use cording.

I've seen a couple of examples of corded garments, but I found one I'd really love to try at Coletterie.  It's simple but it adds a lot of visual interest.


I swear I saw a Bernina video a few months ago about cording, but I can't seem to find it.  So instead, I found an equally informative article from "Threads" magazine that explains how to stitch cording by winding it onto your bobbin.  I'd love to try this kind of cording on a dress, so I'm going to keep this up my sleeve until I have the right project to try it on.

xx

Monday, November 28, 2011

Ordered: OttLite Task Lamp & Dritz Dress Form!

Hooray!  I took advantage of Joann's online Black Friday and ordered a couple items that I've been needing.

Anyone who is into sewing/crafting/etc. knows you need a good light source to get the job done.  I have always admired the OttLite lamps and I finally got to the point where my meager Ikea lighting just wasn't making the cut (har, har, get it?!  okay, yeah, not that funny...).  Thankfully Joann's had some terrific Black Friday deals online, including an OttLite Task Lamp for $19.99, down from the regular $89.99 price tag.  At some 77% off I just couldn't pass it up.


I also go a dress form.  Oh. My. God.  I've been reading all sorts of reviews and decided to give the Dritz Simple Fit dress form a try.  I really wanted to buy the Fabulous Fit dress from, but at $400, I couldn't justify the price even though it had good reviews.  The Dritz model I ordered is newer so there weren't many reviews.  Reviews for similar models complained about how the stand was unstable, but it looks like the Simple Fit model has an updated base.  I checked the return policy, so if it ends up being a disaster, I'll just bite the bullet and pay for the return shipping.


*If* the dress form looks like it will work well for my purposes, I'll probably order the Fabulous Fit fitting system to help mold the form into an Angela-shape.  Dress forms are always going to be imperfect unless you pay to have a custom form made.

I can't wait until my goodies arrive so I can put them to work.  Yay!

xx

Wednesday, November 23, 2011

Color, Pattern & Texture Inspirations

I've been playing around with my camera and iPhoto quite a bit and captured some pictures that I find inspirational in terms of color, pattern, and texture.  I'd love to use these as a sewing guide some time in the future.


I think this is my favorite picture from the whole trip.  It's currently my desktop.


All but the top two photos were taken in Iran.  I really need to scout out more SF Bay Area locales for photo ops.

xx

Tuesday, November 22, 2011

Progress: Christmas Party Dress

My dress is almost done, but with the short week because of Thanksgiving, I doubt I’ll have time to finish it until the weekend.  Nonetheless, I am very happy with how it’s going!

After assembling the bodice I discovered I had to make some alterations to the vertical darts.  I consider myself to be a fairly slender person and I did compensate for my less-than-hourglass figure by cutting the waist and hip a size larger, but it was still far too tight in the waist!  To fix the problem I removed the darts and replaced them with narrower ones.

Chalk outline = original dart per pattern 

Assembled bodice with adjusted darts

I also needed to make some adjustments to the seams on my dress.  The lace on my dress is made of synthetic material, so it’s pretty darn scratchy on my ridiculously skin.  To avoid any problems, I finished all the seams with bias tape.  Not only does the tape help stop the itchies, it also helps prevent the silk fibers from fraying because we all know what a huge mess that turns into about 0.2 seconds after cutting out all the pattern pieces.  I wanted to get a crazy-obnoxious color bias tape (magenta!), but Joann’s didn’t have the colors I wanted in the width I wanted, so I settled for lavender.

Scratchy seams!

Seams with lavender bias tape (note my iPhone on the left playing Mad Men)

I finally have the skirt attached to the bodice, and am left with sleeves, a zipper, and hemming to complete.  Hooray!  I’m so happy it’s turning out well!  There are sequins all over the house and I’m sure it will shed more during the party, but I don’t care because it’s going to be so purdy.  Yes, purdy.  Unfortunately pictures with flash just don't do the dress justice.

Left: front of dress.  Right: back of dress sans zipper.

I hope to have a final product to share within the week!

xx

Monday, November 21, 2011

Iran Souvenirs: Tchotchkes for the Home

I decided to share some pictures of the souvenirs I brought back from Iran.  They had such great stuff at the bazaars that I had a horrible time choosing what to buy!

Because the United States embargo on Iran, I could not use travelers' checks, credit cards, or debit cards.  Strictly cash only.  Since the Iranian rial is so weak against the US dollar, I wasn't too worried about running out of money before the trip ended.  I stowed $1000 cash in my money belt and boy was it more than I ever needed.  I bought a ton of stuff, used a chunk of it for tips for our drivers and tour guides, and I still had several hundred leftover when I was done.  Iran is an incredibly safe country, and the only time I felt slightly unsafe was being corralled through "airport security", which basically is where, in my case, women elbowed each other to get themselves and their possessions through the scanners first.

Here are some of my finds from Esfahan...


This is an enameled copper dish, about $10.  Iran is known for its miniaturist painting, i.e. pictures and designs painted with teeny tiny brushes containing only a few hairs.  The man who owned this shop allowed me to try painting an item he was working on, but I think I did a horrible job!  He asked me how hard I thought it was, and I admitted it was very difficult.  Bowl is for my mom.


Turquoise!  These 6 pieces cost me $250, including the 10% I negotiated down.  The four round ones on the bottom are for earrings (pair for me and a pair for my mom).  The one of the top left is for my sister, and the top right is mine; these two will be made into pendants.


Camel bone boxes painted by a miniaturist student.  My box is on the top, sister's is on the bottom.


What the inside looks like.  I still can't believe it's made out of camel bone!  $50 for both.


My "apothecary" jar.  Enameled copper by the same artist as the bowl.


Inside the jar.  This cost about $15.


And the pièce de résistance: my copper lantern.  These things are everywhere.  Solid copper and hand forged.  Cost: $35.

A couple of notes!
  • Bargaining in Iranian bazaars is not the same kind of bargaining we see at garage sales here in the States.  Americans are used to automatically offering half price, but this is totally unacceptable to Iranian merchants.  Standard discounts are usually no more than 10%.  Depending on whether or not I was buying multiple items, I adjusted my offer accordingly, and I was never declined.  A nice thing is that all merchants generally accept USD.
  • Turquoise is cheaper in Iran because of the exchange rate and the plentiful supply of quality stones, but they are not dirt cheap.  On the upside, they are actual turquoise stones.  The majority of turquoise in the US, as I have learned, is reconstituted.  Because turquoise is so fragile and the layer of stone so thin, it's hard to get good pieces.  In the States it's a common practice to take inferior stones, crush them, then mold them into a desirable shape.  I may have been able to get cheaper stones at home, but they more than likely would have been artificial.  I purchased my turquoise from a reputable jeweler.  Also: jewels/stones are usually purchased separate of a setting.  Labor is cheap in Iran, so most Iranians have their jewelry custom made.  I unfortunately wasn't in any city long enough to get my stones set.
These are only some of my souvenirs, so I'll have to take pictures of the rest.

Hope you enjoyed looking!

xx

Friday, November 18, 2011

Sewing Inspiration: Betty Draper

I am kind of obsessed with the AMC television show, "Mad Men".  Like seriously.  I currently have season 4 on my iPhone and I watch it while I'm on my elliptical machine.

All kidding aside, "Mad Men" has fantastic costuming and is great inspiration for sewing ideas.  I admit I dislike Betty Draper as a person, but I love her clothes.  Here's my Betty Draper inspiration wall...

Season 2

Season 1?

Season 3

Season ??

Season 2

The only major problems I find with these silhouettes are (a) you need a petticoat of some sort to add volume to the skirts, and (b) you need a bullet bra to properly fill out the bust.  I read a fantastic article over at Gertie's New Blog for Better Sewing on bullet bras vs. t-shirt bras.  It was both funny and informative.

xx

Thursday, November 17, 2011

Hot Patterns Wong-Singh-Jones Marrakesh Drawstring Pants

Um.  I might not know where to start.  Well, I most definitely know you don't start with the instructions.  Because there barely are any.


I'm pretty new to the world of sewing, but I'm always up for a challenge.  Maybe it stems from my teacher's pet days, or maybe it's because I'm incredibly stubborn and refuse to give up.  I figured drawstring pants would be a great place to start when it comes to pants.  They're not incredibly fitted, and there are fewer seams.

I needed a pair of loose, comfortable pants to wear in Iran because I knew it was going to be hot.  I found slub linen on sale at Joann's and got to work on my pants.  Or at least I tried.

The instructions are incredibly confusing and are not ideal for someone with very little experience.  With broad statements like "attach waistband", unless you have done one before, you probably won't know how it's supposed to work.  Also, I was not a fan of the approximations of how much fabric I would need.  I don't want to be told, "You'll need about 2 yards of fabric", because it depends on the type of fabric, the pattern, if there's a nap, if you are making super big pants, the width of the fabric, etc.  I am paying you, the pattern manufacturer, to tell me how to make these pants, so can't you at least give me proper instructions?  I almost feel like someone who didn't know how to sew wrote the instructions.  That bad.

In the end, the pants turned out okay, and just okay.  They were too tight on my butt, so I had to make some adjustments for that, and the zipper is a bit wonky because the instructions are really terrible (I got to the point where I had to pull out a pair of my jeans to figure out how they had been assembled).  The concept of the pants is nice, but execution-wise, I need to re-design the assembly process.

Pants before I attached the waistband: crazy zipper, prominent pockets, and "pilates bedonkadonk" before I adjusted the seat

The pants worked out great for my trip: they were comfortable, breathed nicely, and dried quickly, especially when given how low the humidity is in Iran.  I'm glad I chose a slub fabric because it needed zero ironing, even though it is indeed linen.  I've worn the pants a few times at home, but since the weather has cooled off, I haven't been wearing them.  I'll be keeping them for at least another season.  Perhaps I'll make another pair of pants in the future, but only after I've had some practice with a different pants pattern.

Persian culture has a thing for unibrows.  And for some reason my pants look incredibly short here.

I would only recommend this pattern if you are particularly masochistic, or you have a decent amount of pant sewing experience under your belt (pun intended).

xx

Wednesday, November 16, 2011

Simplicity tunic

It's time to catch up on completed sewing projects!

I sewed Simplicity top 2255 before I went on vacation.  I needed a top that would reach my elbows, cover my pelvis, and was loose-fitting.


It ended up being a terrific garment to wear in Iran, and it's still fashionable enough that I would be more than happy to wear it at home since I could roll up the sleeves with the nifty tabs.

The pattern was easy enough to follow, though it could have used some clarifications when assembling the placket.  I usually like to zone out a little bit while I'm sewing, so if you aren't careful, you might not notice that the instructions didn't tell you to copy placket assembly to the other half of the shirt front.  Whoops!  It's not a big deal, and if you have half an ounce of common sense, you can figure it out.

I chose a Liberty of London Tana Lawn fabric.  It was quite spendy at over $20/yard, but it has such a tight weave that I know I won't have any problems with the fabric failing.  I had been eyeing similar lawn shirts at JCrew, but I couldn't bring to spend upwards of $80 for a skimpy shirt with low-quality cotton fabric.


The two above photos are of me at my house.

Ta-da!  Muslim-friendly clothing!  This photo is of me at the Friday Mosque complex in Esfahan, Iran.

All in all, I love the results and I would recommend this pattern to a friend.

xx

Tuesday, November 15, 2011

Christmas Dress

I've already begun construction on my party dress!  I was fortunate enough to snag some vintage lace for CHEAP and get some nice silk/cotton blend fabric from a local silk shop for lining.  Check out my lace!


I'm pretty sure it's polyester (boo) but I'm not too picky with lace.  Silk lace is ridonculously expensive, and I surely was not prepared to spend over $100 per yard on a material I have never worked with previously.  This lace will be more than fine.

I was flip-flopping on a dress pattern for about a week.  But after mulling it over and talking to some girlfriends, I decided on Vogue pattern 8766:


I'm going to change the sleeves a bit.  I hate having sleeves that hang just below my elbow because I find myself constantly pulling my sleeves up so I can have full use of my arms.  Not good.  I am shortening the sleeves a few inches to remedy the problem.  I am also going to line the sleeves with my silk/cotton lining.  I love the idea of bare arms under the lace, but my lace is brown, my lining is black, and I think nude arms would just look really awkward and incomplete.  Polyester silk is kind of scratchy to boot, so I think lined sleeves are a win-win.

I also adjusted the waist and hip proportions of the pattern.  I'm technically classified as an "athletic figure", i.e. I have little to no discernable waist, so I adjusted the pattern accordingly.  The pattern is a 6-8-10-12 and my waist/hip is more of a 14 according to the pattern measurements, so I extrapolated a bit to hopefully get a better fit on my bottom half.  Before starting pilates I wouldn't have had a problem with the hip measurement, but I can thank all the booty busting exercises for giving me a larger, perkier derriere. (thanks, Drea!)

I'm not sure about using a ribbon as a sash...it looks a little haphazard to me.  I have a feeling I'll like it better without the ribbon, but we'll see.

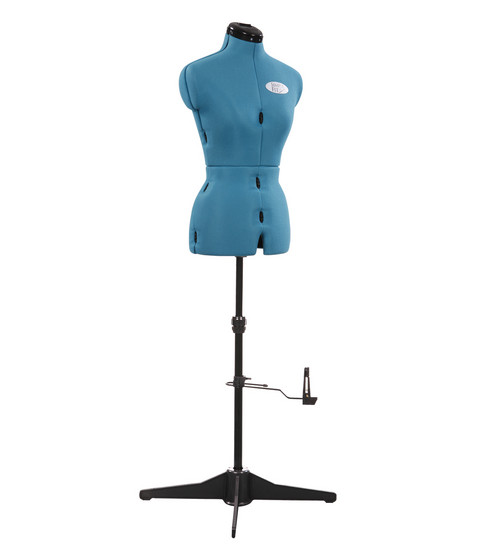
I've cut out almost all the pieces; all I have left is the lining for the sleeves.

I (hand) basted the lace to the lining, per the instructions.  I'm an avid Gertie's New Blog for Better Sewing reader, so I have been using her sewing tips.  My machine can make long stitches, but when basting, you want reeeaaaaallllyyy long stitches so it's easier to pull out the basting later on.  Hand basting doesn't take long at all, and it helps give you a very professional result.

Since all the basting will eventually get pulled out, I used magenta thread just to make it a little easier to see.


I spent this evening after work doing all the basting, so the next step will be to sew in all the darts, but I'll save that for a different day.

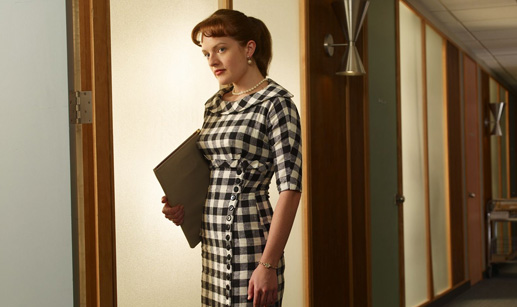
I'm really amped for the final product.  I have a feeling the dress will end up looking really "Mad Men" given the pattern of the dress, but that is more than okay with me.  I'm still trying to decide what kind of shoes to wear, but I'll probably just end up wearing my Gentle Souls ballet flats.  They're cute and sooooo commmmfortable.

I also need to make a petticoat because I want a little bit of flounce to the skirt instead of it hanging straight down.  I guess that means another trip to the silk shop is in order!

xx

Monday, November 14, 2011

Meet Peggy!

Shortly before heading out of the country for my month-long vacation, I purchased a new Bernina sewing machine.  I bought my machine at our local sewing mecca, Eddie's Quilting Bee in Sunnyvale, CA.  I wasn't planning on buying a new machine, but I couldn't pass on the price, especially given that Bernina was discontinuing the model I liked.  $3000 later, my new little machine has been humming away like a dream.


Of course I needed to name my machine.  She's sassy, she's intelligent, and she can kick butt.  I'm quite famously obsessed with "Mad Men", so who else would I name my machine after?!


Well none other than Peggy Olson!  I think it's a pretty terrific fit.

What I find really funny is that Bernina machines come with a little accessory case.  To me, it looks like a Barbie armoir.  Seriously.  It's the size of Barbie.  Has double doors like a real armoir.  And it has drawers that would be perfect for all of Barbie's shoes and accessories.


Barbie closet.  For reals.

I'm still learning all the functions on my machine, but I'm very amazed with its capabilities.  It has a hands-free lever you can operate with you leg which will drop the feed dogs while lifting the presser foot.  Winding a bobbin is a snap, and with drop-in loading, you save lots of time.  I made a wool coat on my machine, and I had no problems with the thickness of the fabric.  I could go on and on about all the wonderful things Peggy can do :)

My new project is a dress for my company's Christmas party.  I don't really "need" a dress, but it's a great excuse to indulge in some fabric shopping and learn some new sewing skills.

That's all for now!

xx